Saturday, 29 February 2020

A Few Bits & Pieces

I bought some really good 'goo' to seal the boat windows in the wheelhouse. I'm upstairs and the 'goo' is down, so I'll try to remember to write the details in here tomorrow.
     It's really sticky stuff and I got plastered as usual - I really don't do sticky very well. It sets like rubber though and so I will neaten it up when it's fully cured.


The paintwork will need an extra coat to hide the battle-field collateral damage. I use a wire wool soap pad to clean my hands afterwards ... although I still managed to get through 10+ pairs of surgical gloves.

I've put stainless-steel spring hooks around the boat to clip fenders on.


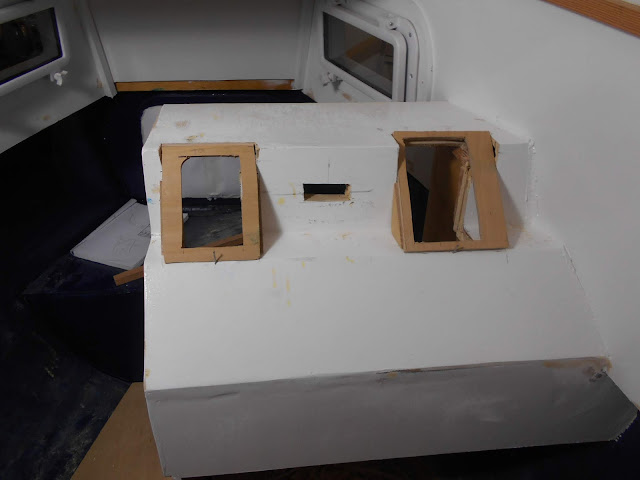
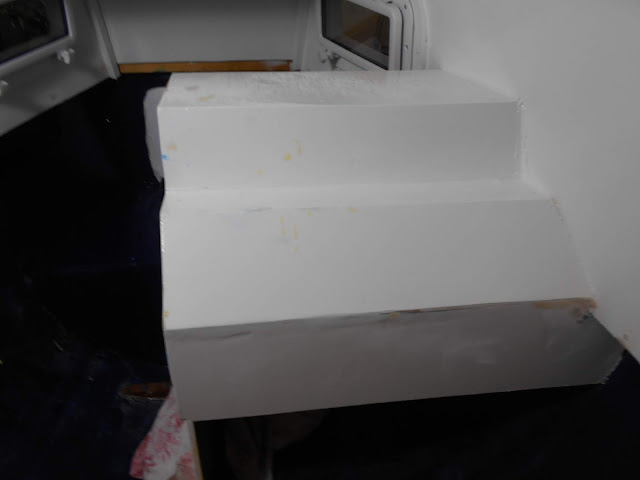
Finally, I've started to build a locker at the base of the control console.


Not a very informative photo as you can't see the pieces under the white panel. Enough to say that is a locker that will go under the console.


That's all for now.

Sunday, 16 February 2020

Deck Fittings & a Bit of Paintwork

The delivery of stainless steel washers to add to the coach bolts allowed me to secure the anchor launching bow bracket. The bracket was removed sealing strips attached, and then it was bolted into place.


The next job was to position three cleats on top of the gunwale, equispaced along either side. Here sealing strips was added and also paste to stop dissimilar metals coming in contact with each other: stainless steel screws securing aluminium cleats to the deck.


To ensure the aperture fairings on the console hadn't moved during glueing, the control panels were offered-up and found to fit properly, so they were removed and returned to their boxes for safe keeping.


 Finally, I gave a coat of white paint to the wheelhouse in general and the control console in particular.

Friday, 14 February 2020

Planning the Electrics/Electronics - Domestic System Part 3

In fact there are no major electrical installations in Part 3, just the preparation for them. 
   To start with I'm going to put slats in the bottom of both aft lockers in order that the batteries can stand level and I have something to screw the battery retaining straps to.


I then screwed the battery retaining straps to the starboard locker slats and secured the battery in place.


I could not believe how heavy the battery was. I've lifted car batteries in the past, but nothing as heavy as this: I could only slide it two or three paces at a time. So how did I manage to get it all the way to the boat and get it into the locker, single handed? I'm a shipwright!

The next task was to destroy the console:


I had to cut holes in the console to accommodate the instrumentation; then streamline the large two holes with plywood mountings I made: 


The plywood mountings were then glued in place with epoxy resin


I'll sand all this down and repaint when the glue is dry.

Planning the Electrics/Electronics - Domestic System Part 2

Just to get things clear, I have never done electrics before, so, if you have a squeamish disposition... look away now. 
   I'm treating this as a water system: the water goes out of the boiler (battery) hot, does its business, and comes back to the boiler cold. If it doesn't come back to complete its circuit it won't work.
     This is going to be done in modules so I can keep a check on things more easily

Module 1. Getting Power to the Wheel House.


Here we will have to safely deliver power from the battery in the aft locker:


to  the wheel house control console.


You may wonder why the battery isn't positioned at the console instead of at the stern. The reason is the starter battery needs to be near the outboard motor and both batteries are coupled and charged from the engine when it is running.

I have seen videos of people doing all the fancy electrical connections - that will be in the console- in uncomfortable positions, on their knees, lying down, and almost upside-down. With this and comfort in mind I made and inserted the panel, on which the electric magic will fit, to suit me . To start I will sit on the seat in the forecastle looking aft.


In front of me, like a music stand, will be the panel I have just made and glued in place.


Which, for those of you still disorientated, the new panel is in the back of this console.


Selecting the cable I need

I'll try to keep this simple because it's the only way I can understand it. I need to know three things:

i/  The voltage in the system = 12 Volt   (it's a 12v battery)  

ii/ The total Amps (see previous post for list of devices total amps)
                           =  10 amp x 2 = 20 amp
    (It's my idea is to double the total amps  - so I can add more devices later)

iii/ The length of cable from battery to console and            return = 40 feet (there is a 3% voltage drop dictated by length of                cable run)

With these three values I can use Table 1 (below) to determine the American Standard Gauge (ASG) cable I need. First, I go along the top of the table until I reach 20 (amps) then down the left column until I reach 40' row. Where they intersect is the wire gauge needed, 6 AWG, however, I've gone for a 4 AWG (1 size up) ... because I'd already ordered it after watching a Youtube video!!


Table 1

Table 1: Wire Gauge for 3% Voltage Drop at 12 Volts
CURRENT (AMPS)*

L
E
N
G
T
H
51015202530405060708090100
10'1814121210108866644
15'16121010886644422
20'1412108866444222
25'141088664422211
30'12108664422211/01/0
40'12866442211/01/02/02/0
50'1086442211/01/02/03/03/0
60'106642211/02/02/03/03/04/

* Current (amps) determined by adding the total amps on a circuit.
To make it just a bit more complex, we don't use AWG in the UK so at Table 2 is a conversion chart from AWG to UK standards.
Table 2

American Wire Gauge
(#AWG)
Diameter
(inches)
Diameter
(mm)
Cross Sectional Area
(mm2)
0000 (4/0)
0.460
11.7
107
000 (3/0)
0.410
10.4
85.0
00 (2/0)
0.365
9.27
67.4
0 (1/0)
0.325
8.25
53.5
1
0.289
7.35
42.4
2
0.258
6.54
33.6
3
0.229
5.83
26.7
4
0.204
5.19
21.1
5
0.182
4.62
16.8
6
0.162
4.11
13.3
7
0.144
3.67
10.6
8
0.129
3.26
8.36
9
0.114
2.91
6.63
10
0.102
2.59
5.26
11
0.0907
2.30
4.17
12
0.0808
2.05
3.31
13
0.0720
1.83
2.63
14
0.0641
1.63
2.08
15
0.0571
1.45
1.65
16
0.0508
1.29
1.31


Materials needed to complete Module 1:

1 x red coloured cable (positive)     (5.19 mm dia)
1 x black coloured       (negative)

1 x double terminal
1 x inline waterproof 20 amp fuse holder
1 x inline waterproof 10 amp fuse holder  

4 x copper tube terminals


That's enough for now