Reasons for loooooong delay in posting: 3 months away in Australia, Christmas, and daughter's Wedding!
I've got to the point when I need to turn the boat 'right-way-up'. However, there remains the outstanding task of applying the final (third) coat of the red anti-fouling. With temperatures hovering around freezing I'm putting off painting as it's outside the temperature range of limits for the paint's application.
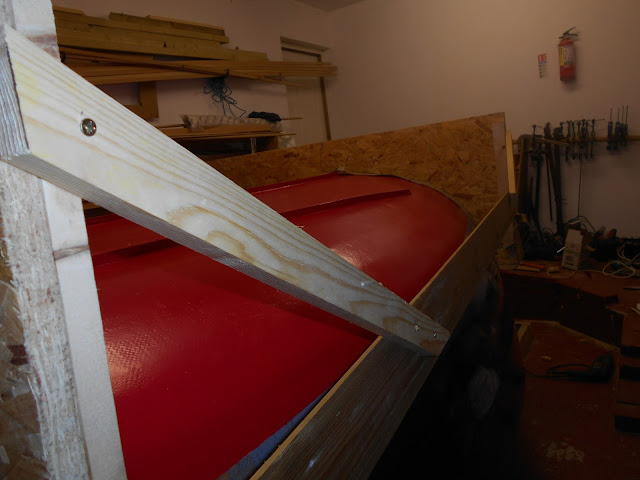
There remains many stages to turning Seagull over, not least a cradle for it to sit in. As she has a rounded bottom! Without the cradle she will roll about as I work inside, and the paint will get scratched.
I used the two off-cuts from the moulds (molds) '9' and '4' for the
ends of the cradle.
Next, strips of carpet were cut and nailed to the edges of the cradle
ends, to stop the cradle scratching the paintwork. I used felting
nails as they have large flat heads which wouldn't pull through the carpet. (TIP: Convince wife that carpet in utility room is dangerous).
To keep the ends in place, as sides I used old tongue and grooved planks I had left over from building my workshop. These needed bracing to keep cradle rigid.
That is the first stage completed, but doesn't answer the question of how I will turn the boat over on my own ... I'm interested to know how I'm going to do it, remembering the small space I have.
 |
| The moulds (molds) |
ends of the cradle.
 |
| CRADLE ENDS from off-cuts from Moulds 4 & 9 (9 is nearest) |
ends, to stop the cradle scratching the paintwork. I used felting
 |
| Carpet nailed to edges of cradle. |
To keep the ends in place, as sides I used old tongue and grooved planks I had left over from building my workshop. These needed bracing to keep cradle rigid.
That is the first stage completed, but doesn't answer the question of how I will turn the boat over on my own ... I'm interested to know how I'm going to do it, remembering the small space I have.

I'm interested as well, how you will turn over the boat. ;)
ReplyDeleteWe shall see, Judy
DeleteI feel I almost know as much as you now, John. I am looking forward to reading the next step...
ReplyDeleteWhen do you start your boat, Julie? :)
Delete